Contents:
Agent Workflow
Object Workflow
Tour Workflow
Tour Stop Workflow
Source Workflow
Location Workflow
Appendix 1: Dates
Appendix 2: Common Authority Controls
Terms and Codes
Agents: AG
Objects: WK
Tour: T
Tour Stops: TS
Source: SRC
Location: Location
Agent: Every person entered into Itinera is an Agent, even if they only have a minor role or only have one life event. They are still Agents who may be of use to a future researcher.
Object: Every thing entered into Itinera is an Object, which includes portraits included in the agent’s metadata.
Tour: Every Agent and Object has a one Tour, even if they take more than one trip. The Tour can be thought of as the agent’s life as it pertains to Itinera. Each Agent or Object has his or her own unique tour, even if two Agents or Objects are traveling together.
Tour Stop: Every Tour must have at least one Tour Stop. Additional Tour Stops are then created for each unique recorded life event that falls within the window of Itinera research. The entity of the Tour Stop is the Agent or Object who is the subject of the Tour Stop. If two or more people are traveling together, the each have unique Tour Stops which are linked to each other.
AGENT WORKFLOW
[Back to top]
Get started:
On the menu bar, click NEW > ENTITY > PERSONAL. A form will appear.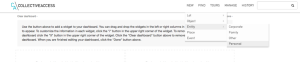
- Entity identifier
Each entity needs a unique identifier. Entity identifiers follow the same alphanumeric format used for other kinds of records (locations, works, etc.).
- Use the format AGYYMMDD##_xx [your two initials, lower-case, without spaces]
- For the ##, begin with 01 followed by 02, 03, 04, etc.

SAVE: Click it.
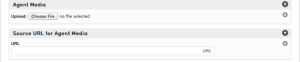
- Agent media
Note: Images must to be of the entire painting/print/object and there should be no question about who the Agent is within the image (alone is best). For more image guidelines see the image guideline page here.
- Each entity needs a “profile picture.”
- To set media, click on “Browse…”
- Select the image file you want to upload from your computer.
- Click “Open”
- If this image has a URL (ex. Wikipedia Commons), please copy/past the source link in “Source URL for Agent Media”
If you don’t have a picture on hand, download and use the default avatar available on the image guidelines page here.
- Preferred labels
This form is for agent names.
- Common prefixes include Sir, Lord, etc.
- Enter the agent’s first name.
- Enter the agent’s middle name(s), if applicable.
- SURNAME/ORGANIZATION.
For an individual: enter the agent’s surname (last name)
For an organization or institution: enter the full name.
- Common suffixes include earl of, 4th earl of, III, Sr. or Jr. Consult the Chicago Manual of Style for nobility capitalization rules.
- OTHER FORENAMES. Skip.
- DISPLAY NAME. The entity’s name as it will appear. This should be consistent with popular scholarly usage, while also being as complete as possible.

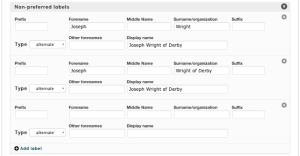
- Non-Preferred labels
Agents may have more than one name: sometimes they have a popular name or translated name. Click “Add label” to add as many as necessary to help Itinera users find what they’re looking for.
- Has tour data?
Click yes.
- Agent Life Date
Add only one date at a time. If you have birth and death dates, enter the birth dates, then click + ADD AGENT LIFE NOTES and add death dates.
- DISPLAY DATE. This field will be displayed online and read by users. Enter agent date.
- INDEXING DATE(S). This field will be read by the computer and will not be displayed online to users.
- The DISPLAY DATE and INDEXING DATES must match. See the “Dates” formatting guide (Appendix 1) for information on formatting and interpreting dates
- LIFE DATE TYPE. Select from drop-down menu.
- LIFE DATE NOTES. Include any information that could be important, but which didn’t fit into the form above. For example, if you lack a birth date but have a christening date instead, include it here.
+ ADD AGENT LIFE NOTES. Click to add additional dates.

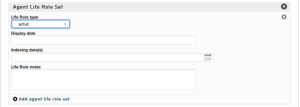
- Agent life role set
- LIFE ROLE TYPE. Select from the drop-down menu.
- DISPLAY DATE. Enter date range for the life role type selected in human-readable format.
- INDEXING DATE(S). Enter date range for the life role type selected, in computer-readable format.
- LIFE ROLE NOTES. Include details as needed, to clarify or specify the data in the above fields.
- + ADD AGENT LIFE ROLE SET. Click to add additional life roles.
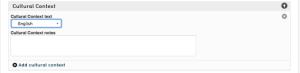
- Cultural context
- CULTURAL CONTEXT TEXT. Click and select from the drop-down menu
- CULTURAL CONTEXT NOTES. Include additional information here, for example, if the agent had a culturally mixed family or grew up speaking a language other than the dominant one.
- If the needed cultural context does not exist, go Manage > Lists and Vocabularies > Cultural Context Values > add new source. Fill out the Identifier as VOC_initials. Fill out Item name singular and Item name plural using ULAN vocabulary and save.
+ ADD CULTURAL CONTEXT. Click to add another cultural context. If the agent had a culturally mixed family or grew up speaking a language other than the dominant one, include that information in the + CULTURAL CONTEXT NOTES.
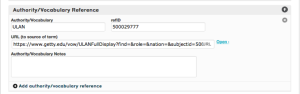
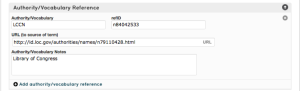
- Authority / Vocabulary Reference
- AUTHORITY/VOCABULARY. Begin typing for autofill. Select.
- REF ID. If the agent information comes from the Getty Union List of Artists’ Names (ULAN), include the unique identifier here. (Please see Appendix 2 for other Authority References.)
- URL (TO SOURCE TERM). If the source is online, include the unique, stable-URL here.
- AUTHORITY/VOCABULARY NOTES. Include any essentially information that does not fit into the form.
+ADD AUTHORITY/VOCABULARY REFERENCE. Click to add additional information about another source, if you have one.
- General notes
These will be included in the entity’s “baseball card” (the profile summary that appears on the Itinera splashpage and the “Traveler” information). Write a brief summary of the entity’s role, importance, and travel. Including any specific or important relationships in this information will help users to navigate the Agent’s social network as well.
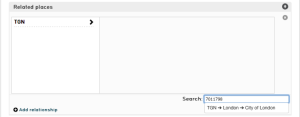
- Related places
Enter places related to the entity’s birth, death, work and commissions.
SEARCH. You can search for a term directly, but the number of options is vast and confusing.
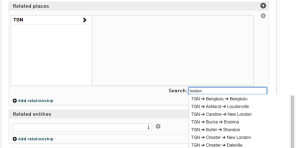
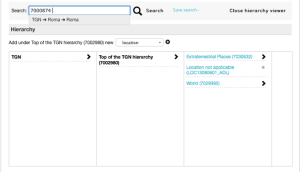
A better strategy is to enter a unique identifier from the Getty’s Thesaurus of Geographic Names (TGN)
- Go to TGN http://www.getty.edu/research/tools/vocabularies/tgn/index.html
- Enter the name of the place you’re searching for, click SEARCH
- Select the correct place name from the list of hits
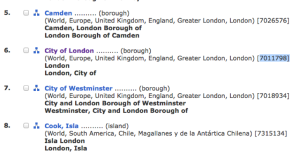
- Copy the unique 7-digit identifier in square brackets
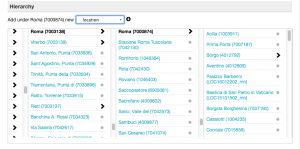
- Return to Itinera and paste the unique 7-digit identifier in the SEARCH box. It will autofill. DO NOT HIT ENTER (this will refresh the page). Select the place.
- A hierarchy of places will appear in the boxes above. Click on the place you want.
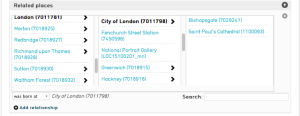
- Selected the relationship (for example, WAS BORN AT)
- ADD RELATIONSHIP. Click to add additional places, for example, DIED AT or WORKED AT.
SAVE. Click it.
- Related entities
Enter related entities by typing their names into the box (wait for autofill). If nothing autofills, it means the entity doesn’t yet exist in the system and must also be created.
+ ADD RELATIONSHIP. You can add as many relationships as you want.
- If you have a pair of people whose relationship changed over time, you will need to ADD RELATIONSHIP for each relationship type.
- Example: if x painted y’s portrait and travelled with him, you will need distinct entity-to-entity relationships for each (portrait sitting and travel).
SAVE. Hit save and the relationship will appear in a box, along with “![]() ” and “X” buttons.
” and “X” buttons.

- Personal Relationship
Click the “![]() ” button. Click to open the PERSONAL RELATIONSHIP dialogue box.
” button. Click to open the PERSONAL RELATIONSHIP dialogue box.
- Begin typing the Source name, and it should appear in the hierarchical menu. If source has not yet been added, see the Source Workflow below.
- HIERARCHICAL CLASS.
Select: Hierarchical |Non-hierarchical
- RELATIONSHIP STRENGTH.
Select: Strong |Unknown| Weak
- When the relationship is very long, but the exact nature of it is unclear (professional, friendship, family / business relationship) the relationship would be considered strong if there’s any documentation
- Even a single letter (correspondence) is “strong” (suggests documentation, not the substance of the relationship)
Even if documentation only exists for ONE side of the relationship still mark the relationship as strong - In the absence of any documentation, use weak as the default.
- ANECDOTAL PARAGRAPH
Copy or paraphrase the textual source describing the relationship.
include the page number or page range for the source: p.[space]###
- RELATIONSHIP DATE. List the dates of the relationship following the standard format.
- Display date
- Indexing date
SAVE. Click it.
Skip it.
Select ACCESSIBLE TO PUBLIC
- Status
Select NEW
SAVE. Click it.
OBJECT WORKFLOW
[Back to top]
Get started:
On the menu bar, click NEW > OBJECT > WORK. A form will appear.

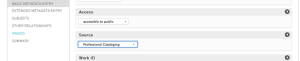
- Status. New
- Access. Accessible to the public

- Please select the source for your information. Usually Professional Cataloging or User-Contributed Cataloging.

- Work ID.
Each object needs a unique identifier. Entity identifiers follow the same alphanumeric format used for other kinds of records (locations, works, etc.).
- Use the format WKYYMMDD##_xx [your two initials, lower-case, without spaces]
- For the ##, begin with 01 followed by 02, 03, 04, etc.

SAVE. Click it.
- Preferred Title
Enter the name of the work
- Usually, you will select “descriptive” under title type unless other conditions apply

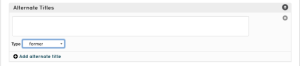
- Alternative Title
Works may have more than one name: sometimes they have a popular name or translated name. Add as many as necessary to help Itinera users find what they’re looking for.
- Agent
You must create agent data for the persons associated with this object (creators, artists, owners, etc.). See the above AGENT workflow for instructions on how to create Agents. Having done that, type the name of the agent. This field will autofill. DO NOT HIT ENTER. Select associated Agent, and then choose the relationship type from the menu on the right.


- Date
Enter the date of creation and any other relevant dates. Select the type of date, typically “creation” from the menu.
- DISPLAY DATE. This field will be displayed online and read by users. Enter object date.
- INDEXING DATE(S). This field will be read by the computer and will not be displayed online to users.
- The DISPLAY DATE and INDEXING DATES must match. See the “Dates” formatting guide (Appendix 1) for information on formatting and interpreting dates.
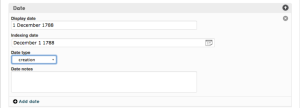
- Select “Date Type,” Usually creation. Add any notes in “Date Notes” field. If multiple dates are associated with the object, select the “Add date” and enter information in separate entries.
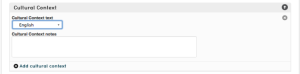
- Cultural Context
Select the cultural context from the menu. This is typically the context under which the work was created, but it could refer to other features of the work. Explain any irregularities in Cultural Context Notes. Add other associated Cultural Contexts by selecting “Add cultural context.”
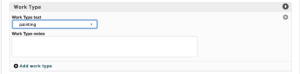
- Work Type
Select the type of work in from the menu. Explain any irregularities in Work Type notes.
- Material Display Text
Include a description of the materials used to create the object, such as “oil on canvas.”
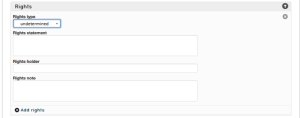
- Rights
Typically, rights will be selected as “undetermined” from the menu, unless the work has clear copyright information that can be added in the notes, such as a published book.
- Location
This is the location of the objects creation or its first known location. All other locations will be in the Tour Stops. Select the object’s location using TGN (See above AGENT “Related Locations” Workflow for detailed instructions on how to use TGN locations).

- General Notes
Add any other information necessary.
SAVE. Click it.
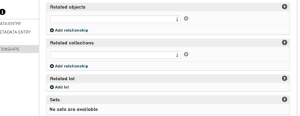
- Other Relationships (Left Column Menu)
If the object is related to other objects in Itinera (for example, if a group of objects form a collection or the object is part of building) relate the object to its partners and select the type of relationship from the menu.

- Every object in the relationship must have Object data
- Type the Related Object in the “Related Object” field
- “Related Collection. Leave blank.
- Related lot. Left blank.
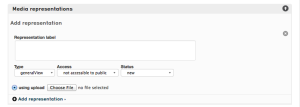
- Images (Left Column Menu)
Upload an image of the object.
TOUR WORKFLOW
[Back to top]
Get started:
On the menu bar, click TOURS > CREATE > TOUR. A form will appear.

- Tour Title
This is the name of the Agent’s or Object’s name, or if the agent or object has more than one name, his or her preferred label.

- Tour Code
Each tour needs a unique identifier. Entity identifiers follow the same alphanumeric format used for other kinds of records (locations, works, etc.).
- Use the format TYYMMDD##_xx [your two initials, lower-case, without spaces]
- For the ##, begin with 01 followed by 02, 03, 04, etc.

SAVE. Click it.
- Introduction
Enter a brief description of the tour
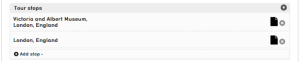
- Tour Stops
Under Tour Stops click ADD STOP. A short form will appear.
- Under NAME, add the Human Readable place name of the location of the first Tour Stop. If the location is a city or natural place, include the country in its title. (Madrid, Spain)
- Under “Type” select whether the tour stop is an AGENT tour stop or an OBJECT tour stop

- If the location is a specific place, include the city and country in its title. (Musée du Louvre, Paris, France).
+ ADD TOUR STOPS. You can add as many tour stops as you wish.

SAVE. Click it.
- Icon
Skip
- Color
Skip
- Access
Select ACCESSIBLE TO PUBLIC
- Status
Select NEW
SAVE. Click it.
TOUR STOP WORKFLOW
[Back to top]
Get started:
Return to the TOUR.
After adding the desired stops on the tour form, click on the “![]() ” A new form will appear for that tour stop.
” A new form will appear for that tour stop.
- Id number
Each Tour Stop needs a unique identifier. Entity identifiers follow the same alphanumeric format used for other kinds of records (locations, works, etc.).
- Use the format TSYYMMDD##_xx [your two initials, lower-case, without spaces]
- For the ##, begin with 01 followed by 02, 03, 04, etc.

SAVE. Click it
- Related Entities
This is ONLY the name of the Agent or Object. Begin typing for autofill. DO NOT PRESS ENTER (this will refresh the page).

- Introduction
Provide a description of the Tour Stop, including the location, agents or objects present, and any events that occurred. This will be the public facing information. Feel free to wax poetically. This should be written in the past tense.
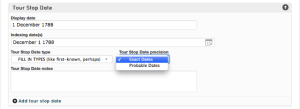
- Tour Stop Dates
Enter the date or range of dates for the Tour Stop
- DISPLAY DATE. This field will be displayed online and read by users. Enter the date.
- INDEXING DATE(S). This field will be read by the computer and will not be displayed online to users.
- The DISPLAY DATE and INDEXING DATES must match. See the “Dates” formatting guide [Appendix 1.] for information on formatting and interpreting dates.
- Select TOUR STOP DATE PRECISION: Exact Dates | Probable Dates
- Related Places
Click on ADD RELATIONSHIP. Enter the location of the Tour Stop.
You can search for a term directly, but the number of options is vast and confusing. A better strategy is to enter a unique identifier from the Getty’s Thesaurus of Geographic Names (TGN)
- Go to TGN http://www.getty.edu/research/tools/vocabularies/tgn/index.html
- Enter the name of the place you’re searching for, click SEARCH
- Select the correct place name from the list of hits

Enter the name of the place you’re searching for, click SEARCH
- Select the correct place name from the list of hits
- Copy the unique 7-digit identifier in square brackets
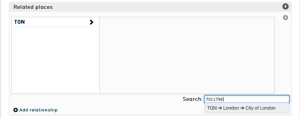
- Return to Itinera and enter the unique 7-digit identifier in the SEARCH box. DO NOT PRESS ENTER. It will autofill. Select the place. A hierarchy of places will appear in the boxes above.
- Select the desired location.
- If you have information on an extremely specific Tour Stop Location (particularly ones that contain addresses, buildings, or sites), you can add this Location to the Related Places list. See below LOCATIONS WORKFLOW for detailed instructions on how to do this.

- Source
Under SOURCE, begin typing the source in the Search bar. DO NOT PRESS ENTER. It will autofill.
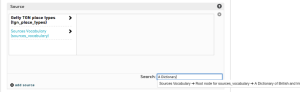
- Select the source from the list that appears.
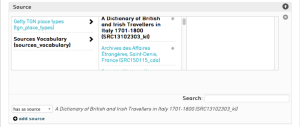
- If you need to add a new source, see the Source Workflow below.
- Related Tour Stops
Click on ADD RELATIONSHIP. Link your Tour Stop to the Tour Stops if your agent or object interacted in any way with other agents or objects at this location. For example, if your agent was joined by a companion or invited to the home of a friend, the two events must be linked in the field.
- Each Entity must have a separate Agent or Object, Tour, and Tour Stop for the other individuals, type in the name of the location to link the two events.
- Begin typing in the field to search for the related Tour Stop.

- Select the related Tour Stop.

- Select “is related to” from the drop down menu if the Tour Stop is related. If the Tour Stop has data conflict, select “has a data conflict with”
- To add other agent Tour Stops, click “Add relationship”
- Access
Select ACCESSIBLE TO PUBLIC
- Status
Select NEW
SAVE. Click it.
SOURCE WORKFLOW
[Back to top]
Get started:
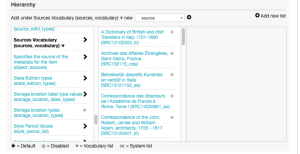
On the menu bar, click MANAGE> LISTS & VOCABULARIES. A Hierarchy will appear.

Select add new SOURCE from the pull-down menu. Select “Source Vocabulary” from the far-left scrollable menu. Click the “![]() “.
“.
- Status
Select NEW
- Access
Select ACCESSIBLE TO PUBLIC
- Is enabled?
Select YES
- Identifier
Each Source needs a unique identifier. Entity identifiers follow the same alphanumeric format used for other kinds of records (locations, works, etc.).
- Use the format SRCYYMMDD##_xx [your two initials, lower-case, without spaces]
- For the ##, begin with 01 followed by 02, 03, 04, etc.

- Main Source Title
Enter the title of the Source
- ITEM NAME (SINGULAR). This field is the title of the Source
- ITEM NAME (PLURAL). This field is the title of the Source, and must match ITEM NAME (SINGULAR).
- DESCRIPTION: Add a short description of the work is applicable.
SAVE. Click it.
- Article/Section Title
Add Article/Section Title if the source is an article or a section of a book
- ITEM NAME (SINGULAR). This field is the title of the Source
- ITEM NAME (PLURAL). This field is the title of the Source, and must match ITEM NAME (SINGULAR).
- Author/Creator
Click on ADD AUTHOR/CREATOR. Begin typing for autofill.
- Each author/creator must be an Agent (See the above Agent Workflow for adding a new agent)
- Publisher Information
Add Publisher Information
- PUBLISHER NAME: Add the publisher’s name
- PUBLISHER LOCATION: Add the location of the publisher. Type the city and state for American publishers and type the city and country for all other publishers
- Source Date
Enter the date of publication or creation
- DISPLAY DATE. This field will be displayed online and read by users. Enter date.
- INDEXING DATE(S). This field will be read by the computer and will not be displayed online to users.
- The DISPLAY DATE and INDEXING DATES must match. See the “Dates” formatting guide for information on formatting and interpreting dates
- Edition
Enter the edition number if the source has multiple editions
- EDITION
- Article/Section Metadata
Add Article/Section Data if the source is an article or a section of a book
- VOLUME NO. Volume number
- ISSUE NO. Issue number
- PAGE RANGE.
- Source refID
Enter reference ID information
- REFID: For a book, enter the ISBN
- REFID TYPE: For a book, enter the ISBN
- Location(s)
Skip
- Rights
For a Book
- RIGHTS TYPE: Select COPYRIGHTED
- RIGHTS STATEMENT: Transcribe the copyright statement from the copyright page of the book
For all other sources
- RIGHTS TYPE: Select UNDETERMINED
- RIGHTS STATEMENT: Skip
- General Notes
Add any additional relevant information about the Source
SAVE. Click it.
LOCATION WORKFLOW
[Back to top]
On the menu bar, click NEW>PLACE
This will bring up the Hierarchy List .
- Choose TGN. Locate the closest location to your desired Entry.
- Preform a Search using TGN from Getty. See above for detailed instructions on using 7-digit ID from TGN site.
- Select desired place by clicking the “
 ” next to the location.
 - Select desired place type from the drop down menu next to “Add under _ (#) new.” Usually “location,” “neighborhood,” or “site.”
- Click the “
 ” to add the new place type. This will bring up an entry form.
Select NEW
Not accessible to public
- Place Identifier
Each new place needs a unique identifier. Entity identifiers follow the same alphanumeric format used for other kinds of records (agents, works, etc.).
Use the format LOCYYMMDD##_xx [your two initials, lower-case, without spaces]
For the ##, begin with 01 followed by 02, 03, 04, etc.

- Location Extent
The “Location Extent” helps identify the place. Common extents include “residence,” “palace,” “villa,” or “site.” These extents correspond to the Getty Art and Architecture Thesaurus (AAT) Vocabulary. If your extent does not appear, it is not defined by the (AAT). Please select the closest extent, or leave blank.

- Preferred Place Name
- Type in the preferred Place Name in the entry Field. This will be the name that appears in the Hierarchy. TYPE ONLY ONE NAME, all alternative names will be entered in the “Alternative Place Names” below.

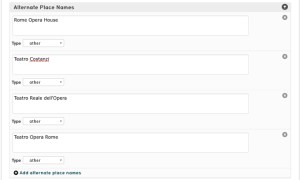
- Alternate Place Names
Enter any alternative names in the field. These alternate names can help users find the location using different names. TYPE ONLY ONE NAME PER ENTRY. If there are several alternative names, click “Add alternate place names” and enter each separately. Select Type from drop down menu.
- Authority/Vocabulary Reference
If there is an Authority reference pertaining to the location, enter the information in the field. See Appendix 2 for preferred Authority References.
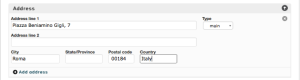
- Address
Enter the information pertaining to the address of the location as fully as possible.
- Georeference
- Type the place name in the search bar. Press Enter.
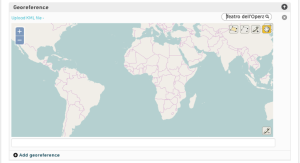
- Zoom in to make sure this is the correct place. (Double check on google maps or another online maps browser to find the correct geolocation).
- Sometimes, the search will not be able to locate the exact place. In this case, there are several ways to find the exact location on the map.
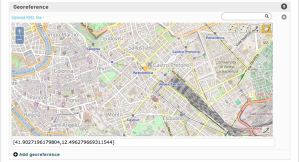
- Once you have successfully located the place, you can select the “
 ” to place the geo location. By selecting the “
 ” you can move the marker.
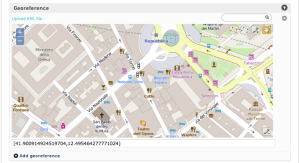
Please Note: IF YOU DO NOT SELECT A GEOLOCATION ON THIS MAP (placing the above yellow dot on the map), THE PLACE WILL NOT APPEAR IF SELECTED AS A REFERENCE PLACE.
SAVE. Click it.
- General Notes
Add any notes pertaining to the geolocation
Appendix 1. DATES
[Back to top]
Tour Stop titles (Introduction): Be as descriptive as you want, at minimum include the [city], [nation] Tour Stop titles should not include dates.
| Display date
The date human users will see. |
Indexing date
The date info the computer needs to search in order to find the object. |
The basics
| Year
YYYY |
YYYY |
| Month + year
Month YYYY no commas |
Month YYYY no commas necessary |
| Date, month + year
DD Month YYYY no commas |
Month DD YYYY no commas necessary |
Time spans
| Year range
YYYY-YYYY |
YYYY-YYYY |
| Month range
Month-Month YYYY |
Month 1-Month 28/29/30/31 YYYY |
| Month, year + date range: same month
Display date field: DD-DD Month YYYY no commas |
Month DD-Month DD YYYY |
| Month, year + date range: different month
Display date field: DD Month1-DD Month2 YYYY |
Month1 DD-Month2 DD YYYY |
| BCE date range
YYYY BCE-YYYY BCE |
YYYY BCE-YYYY BCE |
| BCE – CE date range
ca. YYYY BCE-YYYY CE |
YYYY-5 BCE-YYYY+5 CE
For BCE dates: the plus / minus will be reversed, because the numbers get smaller, not larger, as you move forward in time. |
Approximate dates
| Approximate year
ca. YYYY |
[YYYY-5]-[YYYY+5] Plus / minus five years on either side is the equivalent of “ca.”. When the system sees this, it will search for a ten-year window around the “ca” date listed in the Display Date field. |
| Two approximate years
ca. YYYY-ca. YYYY both are approximate. If only one or the other is approximate, include the “ca.” as appropriate |
[YYYY-5]-[YYYY+5] |
| late-to-early approximate dates
late 14th-early 15th century |
YY66-YY33 Ex: 1466-1533 |
Interpreting dates
| Source text | Display date | Indexing date(s) |
| spring
summer fall winter |
spring
summer fall winter |
March 1-June 30
June 1-September 30 September 1-December 31 December 1-March 31 |
| early [season] not capitalized | Early [season] not capitalized | Spring = March-April
Summer = June-July Fall = September-October Winter = December-January |
| middle [season] not capitalized | Middle [season] not capitalized | Spring = April-May
Summer = July-August Fall = October-November Winter = January-February |
| late [season] not capitalized | Late [season] not capitalized | Spring = May-June
Summer = August-September Fall = November-December Winter = February-March |
| early October | October 1-10 | October 1-10 |
| mid October | October 10-20 | October 10-20 |
| late October | October 20-31 | October 20-31 |
| Known date (using August 4 as an example) to before October | 4 August-before October | August 4-September 30 |
| Known date (using August 4 as an example) to before October 15 | 4 August-before 15 October | August 4-October 14 |
| Before October to Known Date (using December 4 as an example) | Before October-4 December | Date of known tour stop to December 4** |
| Known date (using August 4 as an example) to after October | 4 August-after October | August 4-Date of next known tour stop** |
| Known date (using August 4 as an example) to after October 15 | 4 August-after 15 October | 4 August-Date of next known tour stop** |
| After October 15 – Known Date (using December 4 as an example) | After 15 October-4 December | October 16-December 4 |
| between September 1749 and November 1750 | September 1749 – November 1750 | September 1 1749 – November 30 1750 |
| Late YYYY | October – December YYYY | October 1 – December 31 YYYY |
| Early YYYY | January – March YYYY | January 1 – March 31 YYYY |
** When a inputting a date range into Itinera involves any sort of interpretation, explain the interpretation in detail in the “Tour Stop Date Notes”
Appendix 2. Common Authorities Controls
[Back to top]
Virtual International Authority File (VIAF)
Getty Research Institute
- Union List of Artists Names (ULAN) http://www.getty.edu/research/tools/vocabularies/ulan/
- Thesaurus of Geographic Names http://www.getty.edu/research/tools/vocabularies/tgn/index.html
Integrated Authority File / Gemeinsame Normdatei (GND)
Library of Congress